To use the Lytx API, you must authenticate by generating an access token. The access token determines which API operations you can access, and requests to operations outside your permissions return an error. The token must be created via user registration using Postman.
Use this advanced Token Authentication process to generate an API access token when your organization uses MFA or SSO Lockout and you cannot use the standard Token Authentication flow. You’ll register the user in Postman, generate a JSON Web Token, and exchange it for a short-lived bearer token that you can use with Lytx API requests.
If your organization does not use MFA or SSO Lockout,use the standard Token Authentication flow instead.
| Credential | Purpose | Where it is used |
|---|---|---|
| Session access token | Authorizes the one-time user registration request. | Copied from your active Lytx Account browser session. |
| Signed JWT | Proves the registered user controls the private key. | Sent to the token exchange request in Postman. |
| Bearer access token | Authorizes Lytx API requests. | Entered in the Developer Portal or sent in the Authorization header. |
- Postman Desktop App
- Git for Windows, which includes Git Bash and OpenSSL
- The Customer Collection.postman_collection.json file
- Lytx Account credentials for a 'Full Access' user at the highest group level. For details about creating users, go to Managing Users.
- For Groups API write endpoints, Lytx Account credentials for a user with both the 'Full Access' and 'Group Manager' roles at the highest group level.
- Download the Customer Collection.postman_collection.json file and import into your local workspace.
- Confirm whether the user you’re registering already has an approved public and private key pair. If not, create one in step 1. Your organization is responsible for securely storing and rotating the key pair. Never share the private key or add it to source control.
At a high level, this process includes five steps:
- Create a public and private key pair.
- Register the user with the public key.
- Create a signed JSON Web Token (JWT) with the private key.
- Exchange the signed JWT for a short-lived bearer access token.
- Use the bearer access token to make an API request.
- If the user does not already have an approved key pair, open Git Bash from the Windows Search Bar, then run the following commands in order. These commands private key (private.pem) and public key (public.pem) in a folder named lytx_keys. Script:
mkdir lytx_keys
cd lytx_keys
openssl genrsa -out private.pem 2048
openssl rsa -in private.pem -outform PEM -pubout -out public.pem
The
public.pemfile contains the public key. Save or copypublic.pemto Postman's working directory. To find the working directory, go to Postman App > Settings > General > Location.If you already imported the Customer Collection.postman_collection.json, select it in Postman.
Log into Lytx Account at login.lytx.com as you normally would, including your organization sign-in and any MFA prompt.
To get your access token, open your browser's Developer Tools, go to Application > Session storage > session, and copy the value of
accessToken.
Right-click anywhere on the page and choose Inspect, or use a keyboard shortcut:
- Windows / PC:
Ctrl + Shift + IorF12 - Mac:
⌘ + Option + I
For other browsers, see MDN's guide to opening the developer tools.
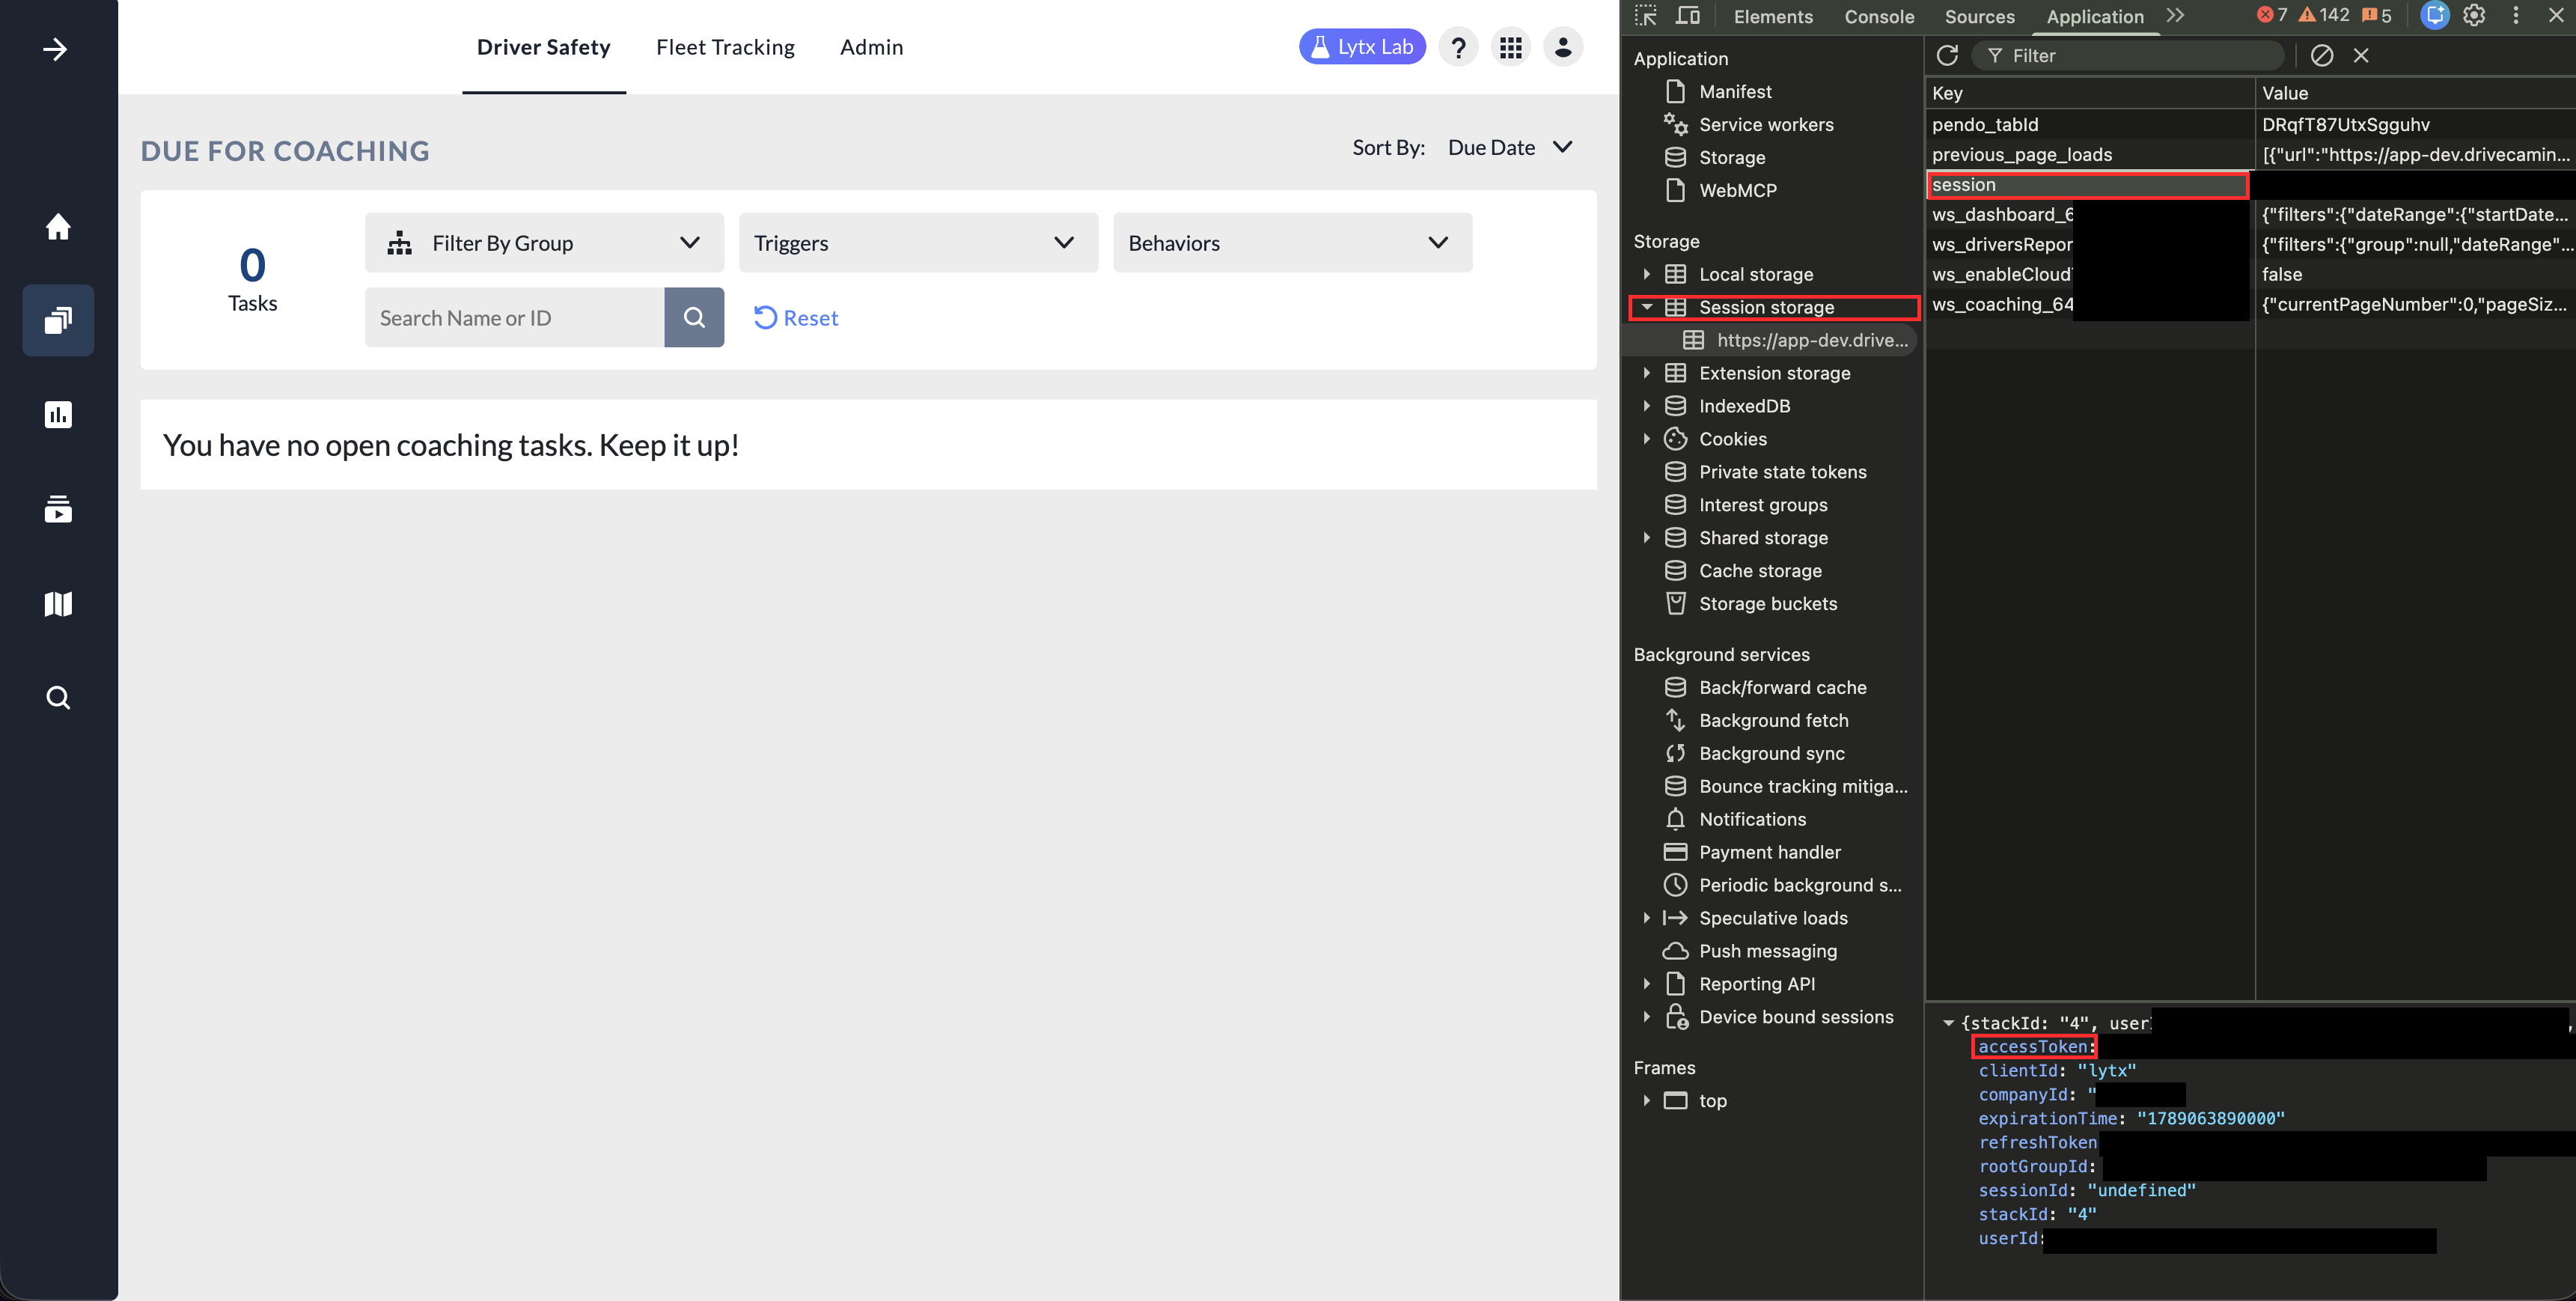 Developer Tools → Application → Session storage → session →
accessToken (values redacted).
In the Variables tab, set the following, then save your changes:
context.auth.access-token— theaccessTokenyou just copied.context.user_id— your Lytx user ID. This is thesubvalue in your token, which you can view by pasting the token at JWT.IO.my_username— your Lytx username. The access token is short-lived, so continue soon after signing in. If you receive a 401 error, sign in again to get a fresh token.
In the User Registration folder, run the POST Register User request and verify it returns 200 OK.
Select the POST Register User call to see the response. The values (header and payload) will be needed in the next section. These values can also be found in the Variables tab of the
Customer Collection.postman_collection.json.
To complete registration, you need to generate a JSON Web Token (JWT). For that, you need the following:
- Header
- Payload
- Private Key
- Public Key
With the header, payload, private key, and public key, you can generate the JWT.
Header sample:
{
  "alg": "RS256",
  "typ": "JWT",
  "iss": "4XMeH767NxCuPZCzWjlHu98aeU1126IN"
}
Payload sample:
{
  "name": "kongtestuser",
  "user_id": "0000ffff-0000-1b00-71ca-ed46b0d60000",
  "co_id": "1129",
  "rootgroupid": "2bb2d9b4-c801-e111-81ce-e61f13277aab",
  "roles": "Developer",
  "exp": 1701887152
}
To generate the access token, complete the following steps.
- Go to JWT.IO.
- For Algorithm, select
RS256. - Insert the Header and Payload from above. The exp field defaults to 1 month, but you can adjust it based on the account's security policy.
- Open the Public and Private Keys files you created in a text editor. Copy the entire Public Key, including ---BEGIN PUBLIC KEY--- and ---END PUBLIC KEY--- and paste it into the top box under Verify Signature. Then copy the entire private key and paste it into the bottom box.
- Once Signature is Verified in the bottom-left, your token is the encoded token on the left. Copy this into the Postman Customer Collection variables under Current Value for thirdparty.access-token. This token is the key component for authorization when calling the GET Short Lived Token.
- Call the GET Short Lived Token request to receive your signed token. This bearer token lasts 60 minutes. If this step is successful, you will not need to repeat steps 1-5 until your JWT expires.
- Copy the token value only. Select the API call you want to make, then select Try It in the top right corner.
- Paste the token under Bearer Token, confirm that all required parameters are complete and any optional parameters are valid, then click Send.